Sponsored by: Cricut. All opinions are honest and my own. This post also contains affiliate links. If you purchase via these links, I may receive a small commission at no additional cost to you. Any time I share Cricut projects, I get asked the same questions over and over again. Okay so if I buy a Cricut machine, is that all I need? Or what tools do I need to use a Cricut? Which Cricut accessories do I really need, and how much is everything all together going to cost me? So many times you buy new machines or gadgets only to realize that you can’t really do much with that new purchase without buying hundreds of dollars in other supplies. Luckily, the Cricut isn’t that way.
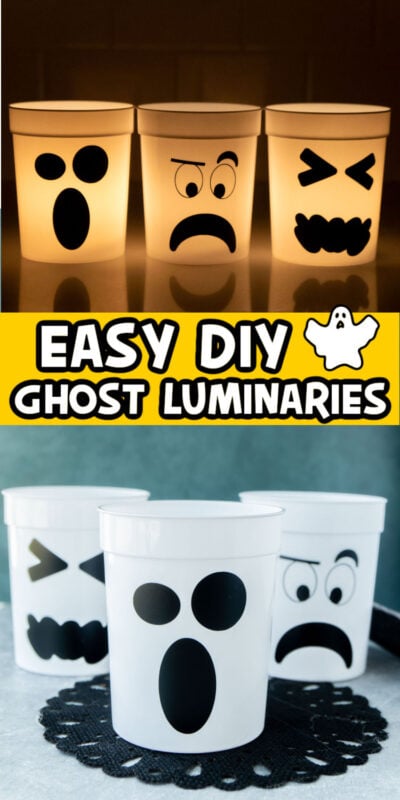
In this post, I’m going to show you not only how to make the cute DIY ghost cups above but also walk you through: What comes with a Cricut machine? Which Cricut accessories are must-haves to really do much of anything?Which Cricut accessories are my personal recommendations if you want to take your crafting a little further? How do I use basic Cricut tools (in the ghost luminary DIY project at the bottom)?
Hopefully by the time you finish reading this post, you’ll see how much you can do by just buying a Cricut machine and a few basic tools! Plus, you’ll get to see how I use those basic tools to make some spooktacular ghost cups that double as luminaries!
Does cricut come with basic tools?
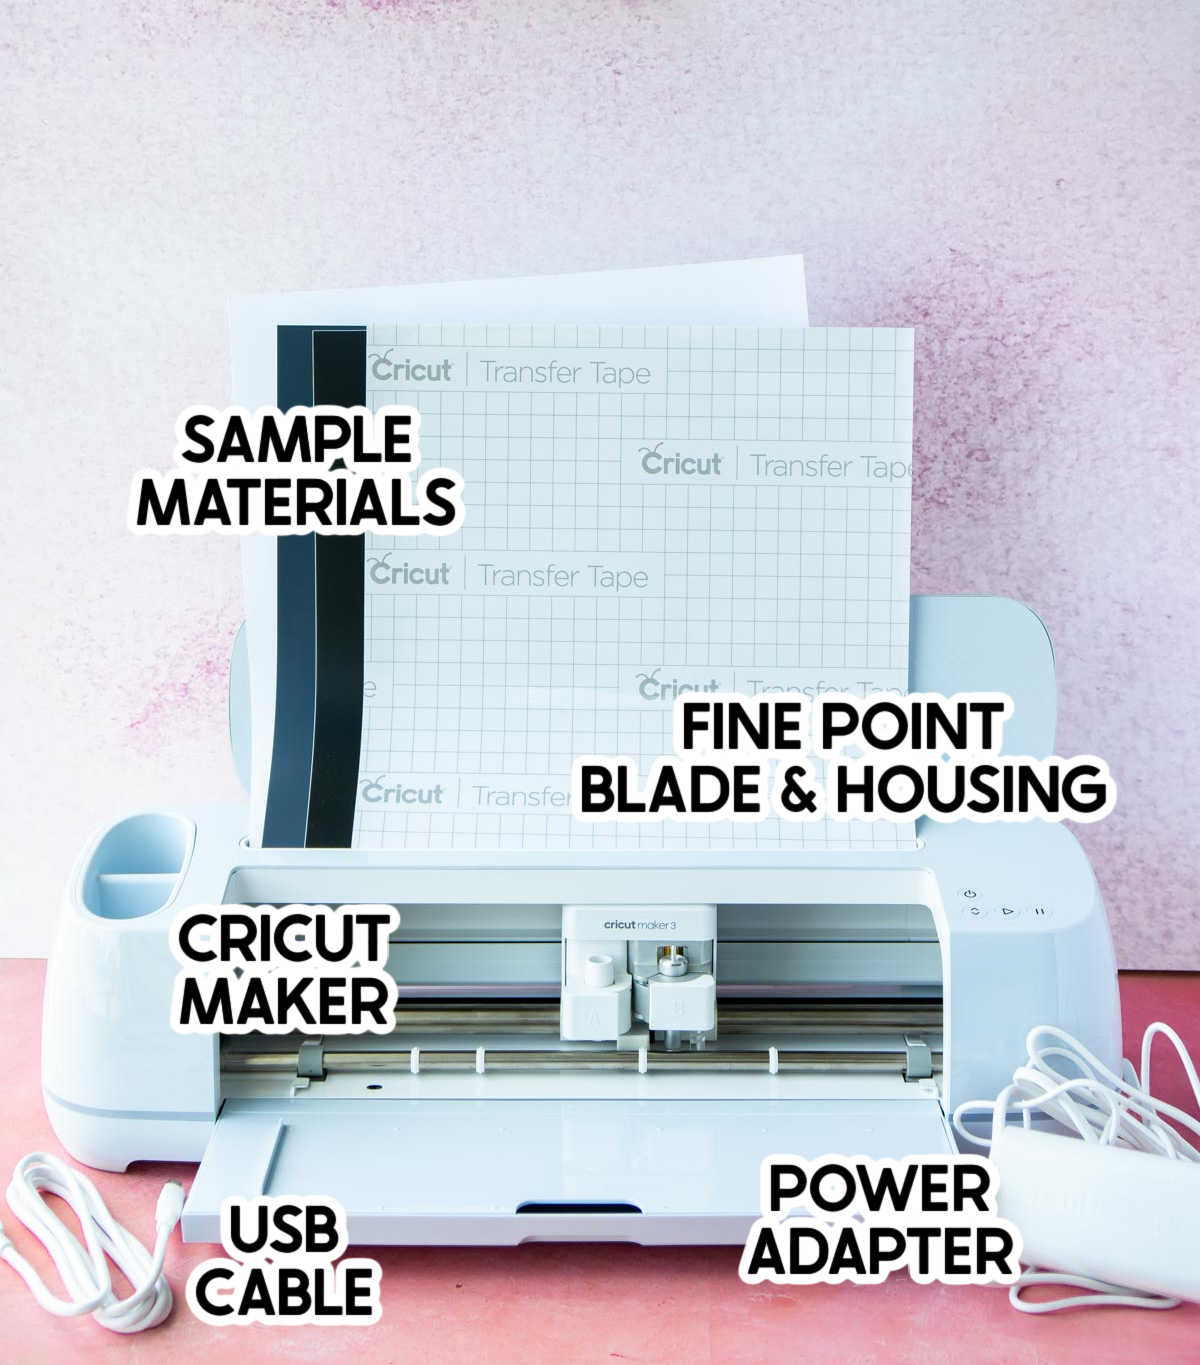
Let’s start at the very beginning. If you buy a Cricut machine, it will obviously come with some things included in the box. Every machine comes with different tools but typically each comes with the tools you need to use that particular machine. I’ve included a picture below of everything that came with my brand new Cricut Maker 3, which is awesome by the way. The Cricut Maker 3 machine is the newest of Cricut’s machines and also their most powerful and most versatile. So what comes in that box? I went and looked at the other Cricut machines and most have similar items included in the box if not a few more. A couple of the machines include a different blade, a mat, and a pen (some of my top must-have Cricut accessories mentioned below). You can check out the machine list on the Cricut website for details on what comes with each of the machines.
Which Cricut accessories do I really need
Okay, so now that we’ve covered what you’ll get with your machine, let’s talk about the other tools you really need to get started – the things that every new Cricut owner needs. Technically there are projects that you could really just do without buying anything additional but if you want to make the most out of your Cricut, I recommend getting these tools when you get your machine. They’ll give you a good start at least!
Cutting Materials
These aren’t technically an accessory but you’ll obviously need something to cut if you want to use your Cricut. Cricut has a ton of different materials to choose from. The Cricut Maker 3 for example can cut over 300 different materials, so there are a lot of options. If you’re just getting started, paper and vinyl are a great place to start. There are a ton of easy Cricut projects you can make with one of those two things including everything from DIY labels to personalized baby items. They’re my go-to Cricut supplies.
Cricut Mats
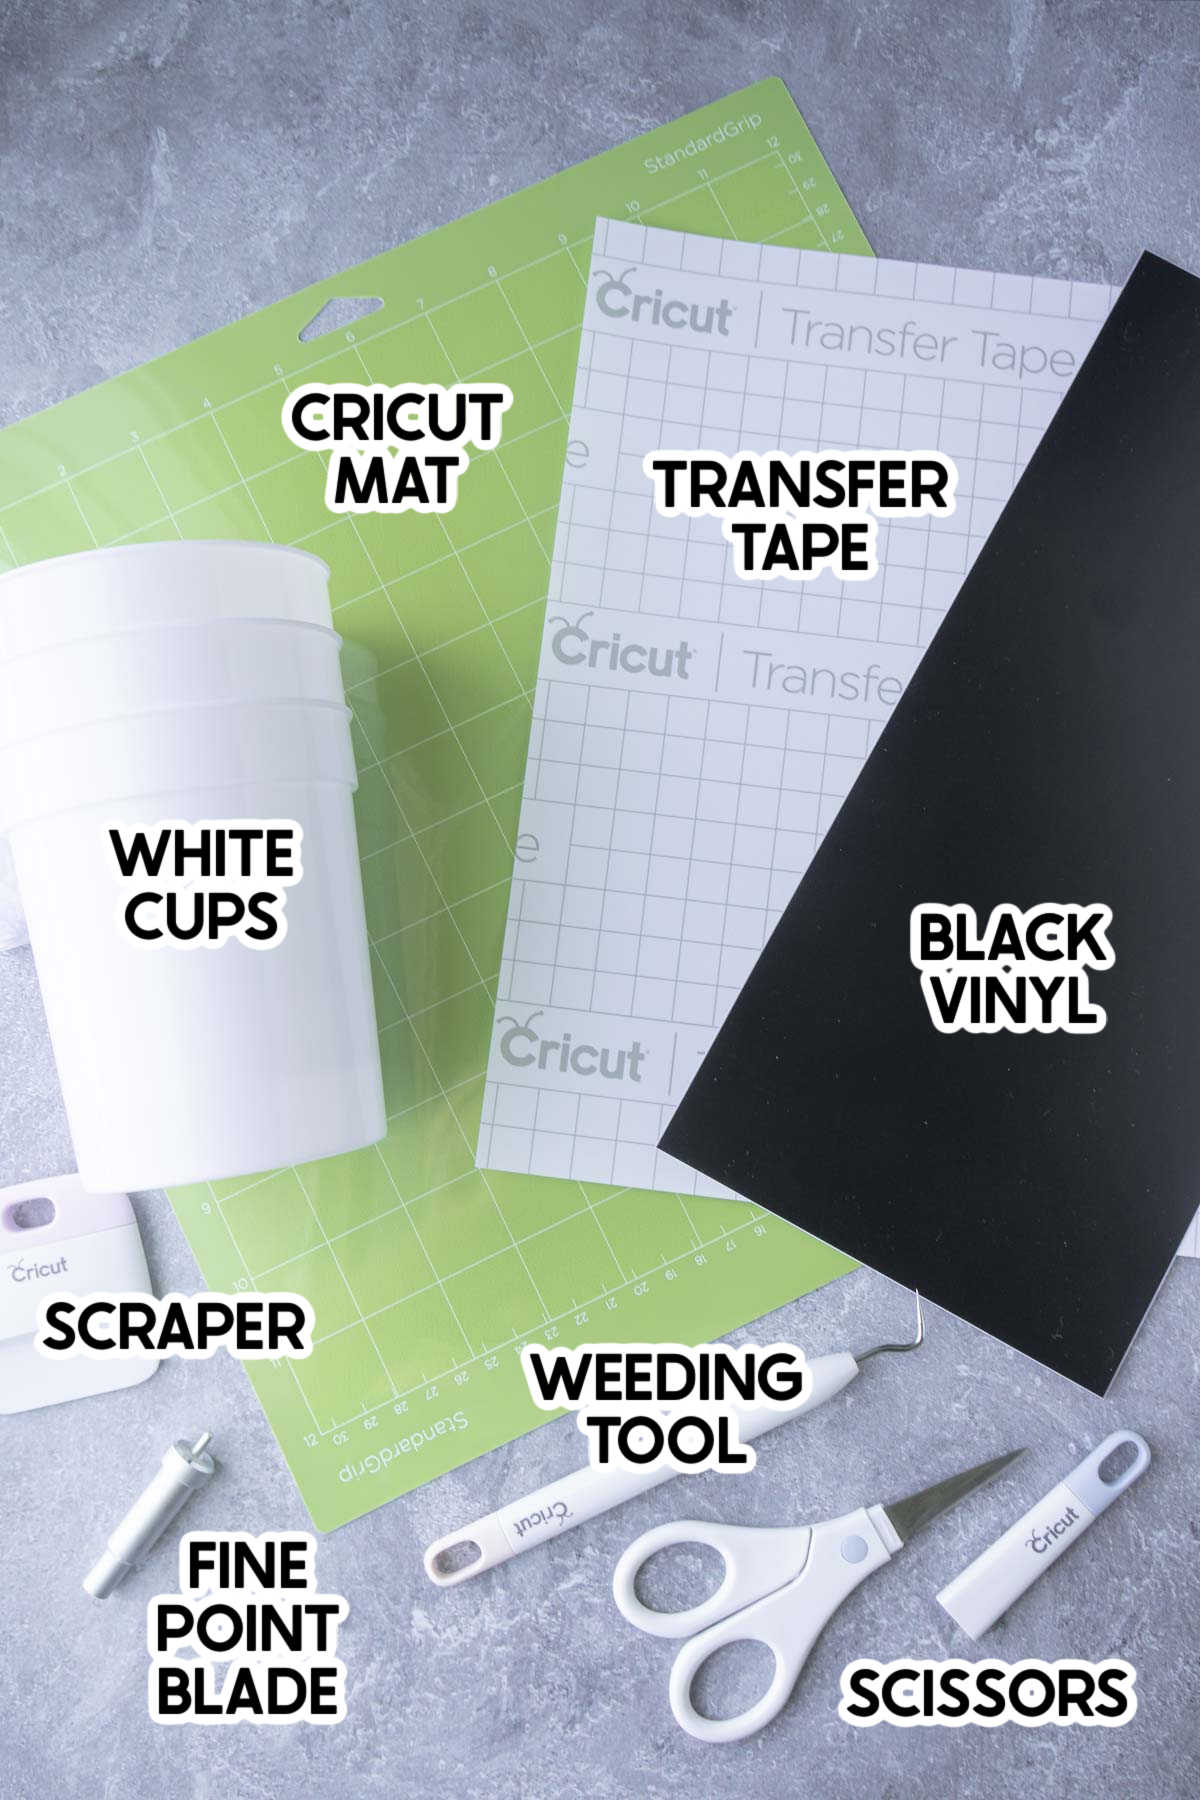
If you have a Cricut Joy or Cricut Maker 3, you could potentially get away without getting a Cricut cutting mat if you’re only going to use smart materials, but I’m guessing you’ll probably want to cut other things as well so Cricut mats make my must-have list. A new mat is never a bad idea. A couple of the machines come with them, but I just like to buy this three pack that has a LightGrip (blue mat), StandardGrip (green mat), and StrongGrip (green mat that’s great for heavier materials) to cover all of bases. Oh, and if you’re looking at tools for the Cricut Joy, its mats come in different sizes than the regular ones. If you’re planning to do a lot of sewing or fabric cutting, you’ll want a Fabricgrip mat, which is the pink mat (not shown in my pictures).
Cricut Transfer Tape
If you’re going to be cutting regular vinyl at all, transfer tape is a must. It’s the best way to transfer vinyl from the vinyl backing to the object you’re putting it on. You can do it by hand but I’ll be the first one to tell you, you’re not going to get it straight. The best thing about Cricut transfer tape is that a little goes a long way. For the ghost cups I made in this post, I used the same piece of small transfer tape for all of my cups.
Cricut Basic Tool Set
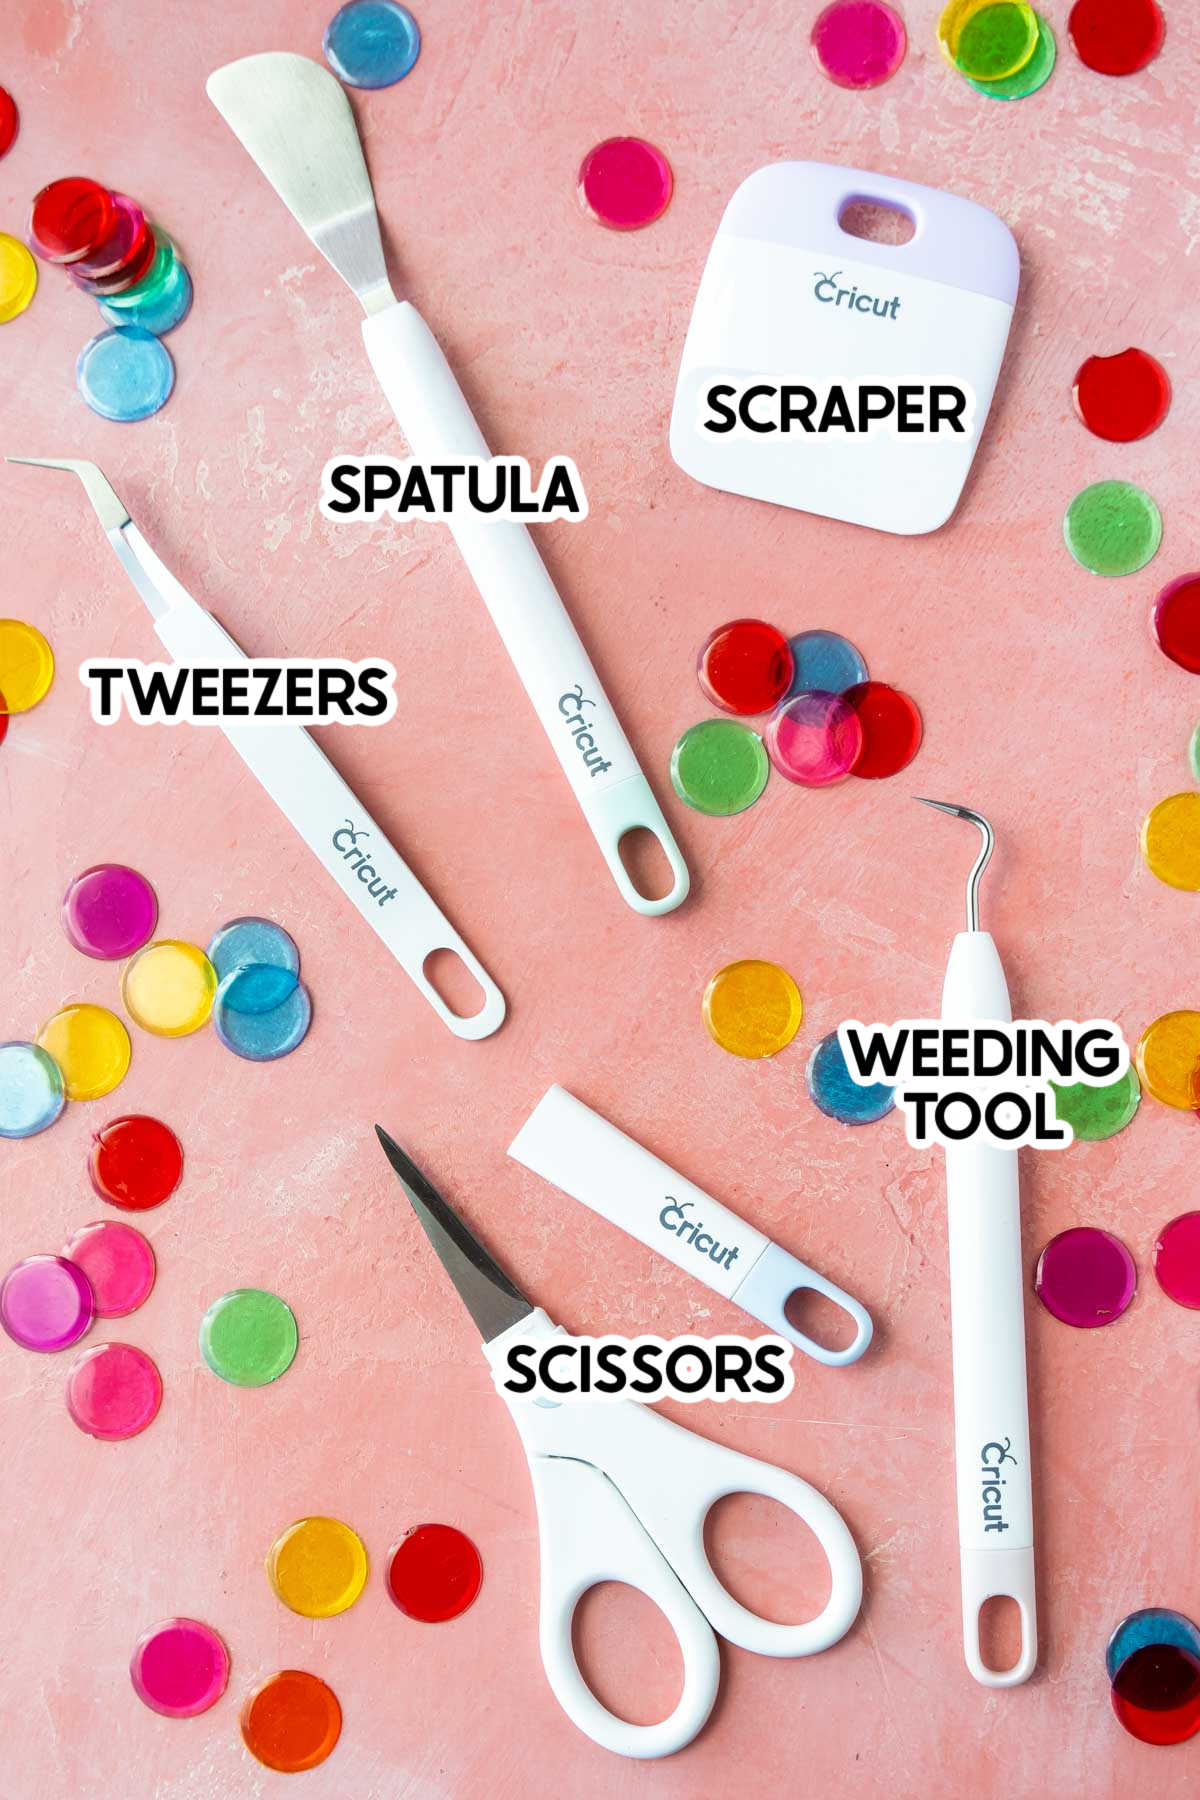
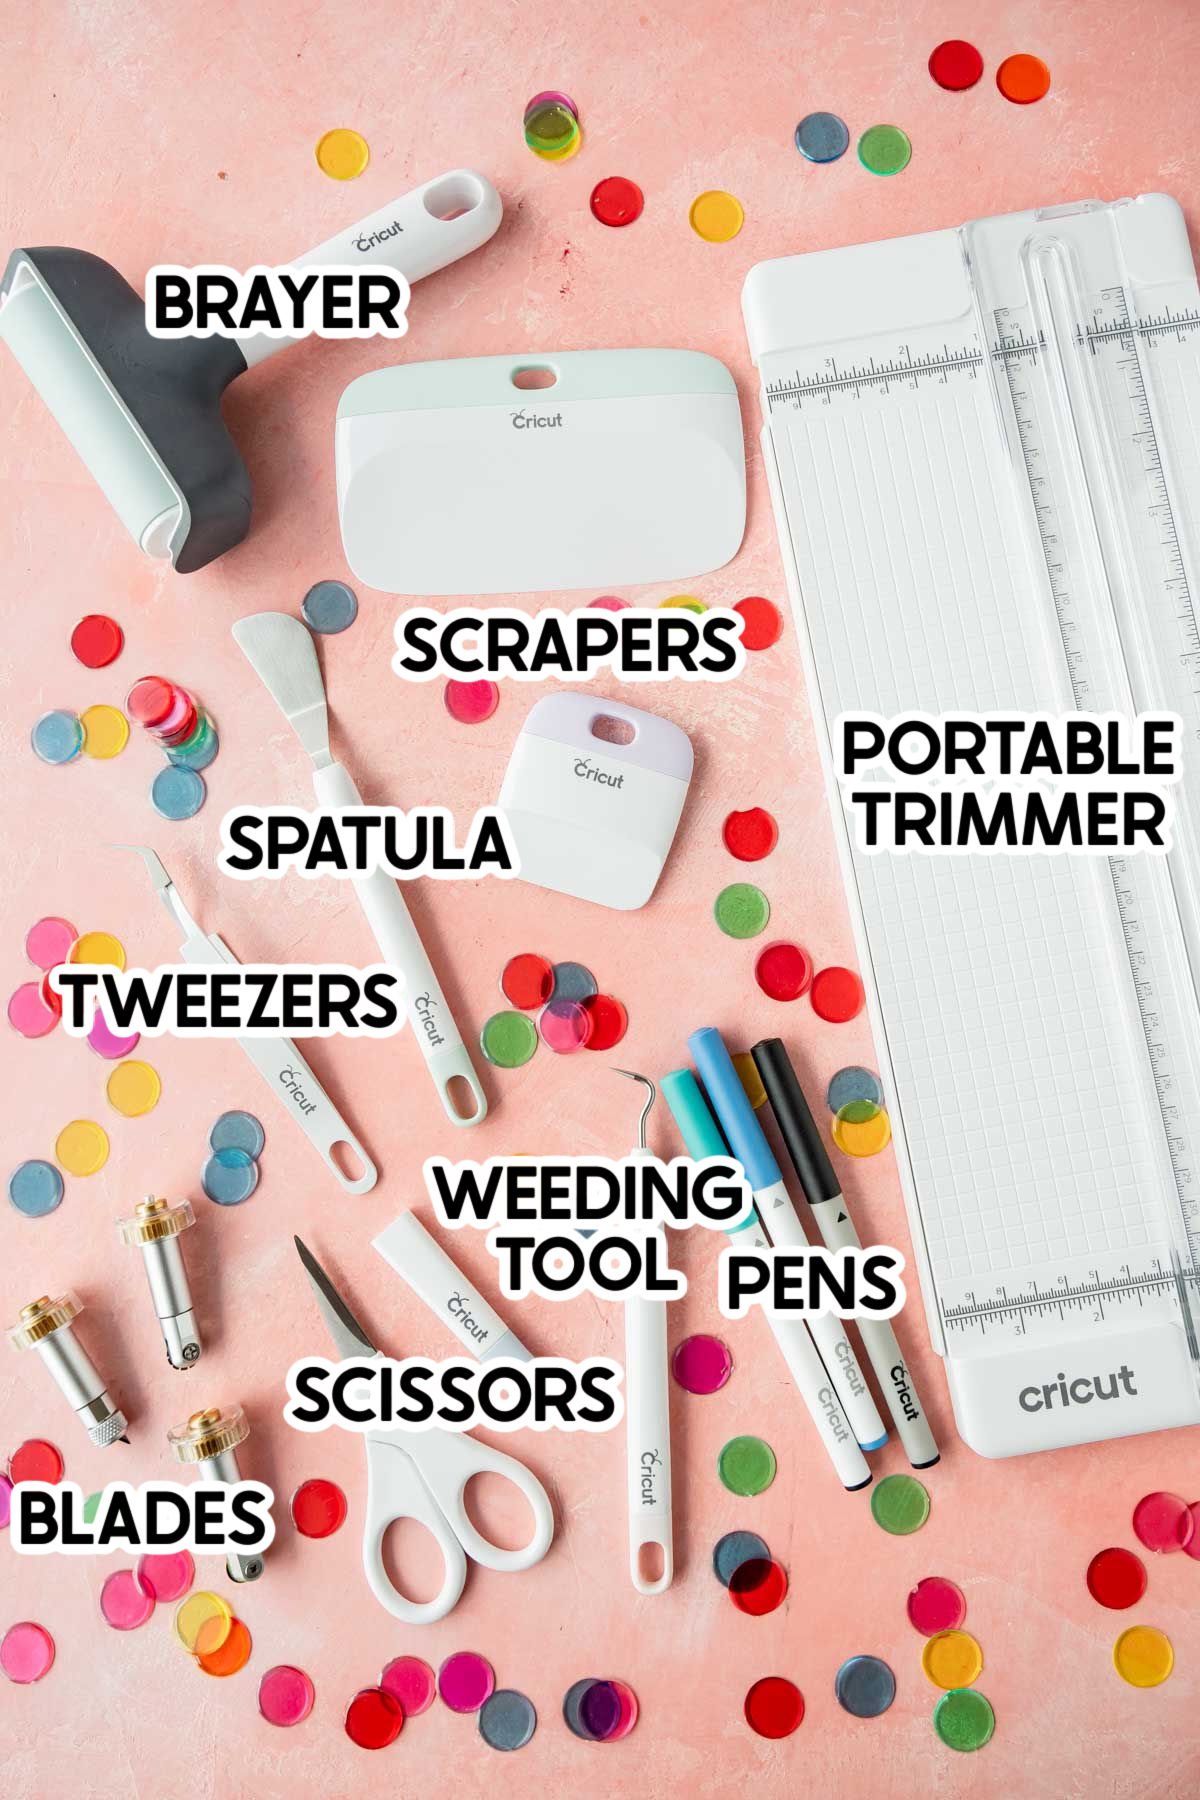
If you’re looking for the actual tools you need, I recommend starting with the Cricut Basic Tools set. It comes with five different tools and four of five of them are ones that I use for pretty much every single project.
What other tools do I need to use a cricut
Okay so I shared my absolute must-have, everyone should buy with their Cricut machine. Now it’s time to talk about my next level of helpful tools to expand your crafting opportunities. One thing to note – this does not include tools specific to fabric and sewing other than the rotary blade. If you are planning to do a lot of sewing, check out this post that goes through sewing tools for Cricut is a great read. The items on this list give you more options of things to cut, more control over the materials, and just really help you take better advantage of your Cricut. That being said, you can just get the things from the list above and make hundreds and hundreds of different crafts, including the ghost cups I’m sharing at the bottom of this post!
Cricut Brayer – I love this thing and use mine all the time. A lot of people use it specifically for fabric, but I use it for all sorts of materials. It’s designed to help you secure materials to mats and does a great job with it. Cricut XL Scraper – while the small scraper that comes with the basic tool set is great, sometimes you want a bigger one for bigger projects. Portable Trimmer – while not necessary, it’s always nice to have a portable trimmer to help cut things to size quickly and accurately. It’s much easier to cut straight lines with this thing than with scissors. Cricut Pens – you can use pens to do all sorts of things from addressing envelopes to drawing things. Cricut has a ton of different colors but a black Fine Point Pen is a good starting good. Blades – if you are getting a Cricut Maker or a Cricut Maker 3, additional blades are a must in my opinion. If you have or are looking at Cricut Explore Machines, you can stick with the fine-point blade. The Cricut Maker comes with a rotary blade that’s perfect for sewing (and so many other things). My other favorite blade for the Cricut Maker machines is the knife blade (you can cut everything from leather to balsa wood), and I also like the scoring wheel (not a blade, but it looks similar). You may also want to get replacement blades for any blades you use often, like the fine-point blade.
And that’s it. Cricut actually sells quite a few Cricut bundles that come with many of the tools mentioned above as well as some cutting materials but if you don’t get a bundle, I recommend picking up at least a few of these must-have accessories for the best crafting experience!
DIY Ghost Cups (Luminaries)
Want to see all of those Cricut accessories in action? I made these DIY ghost cups with just the materials that came in the Cricut Maker 3 box plus my list of must-have Cricut tools! These are a simple Halloween project that literally took me about ten minutes to make and could used for all sorts of things – as cups, as luminaries, as Halloween party favors, or even just as Halloween decorations! Plus, they’re super easy to make, especially if you use this Cricut Design Space file I made for you!
Ghost Cup Supplies
Other than the things already mentioned above, the only thing you’ll need are some white cups or white containers. I grabbed a 3-pack at the dollar store, making this a super cheap project as well! I used the Cricut black removable smart vinyl that came in the Cricut Maker 3 box but you could use any black Cricut vinyl you want. Black vinyl is one of my favorite craft tools, so it’s never a bad idea to have it on hand.
How to Make Ghost Cups
This project is super easy to make.
1 – Make Your Ghost Designs
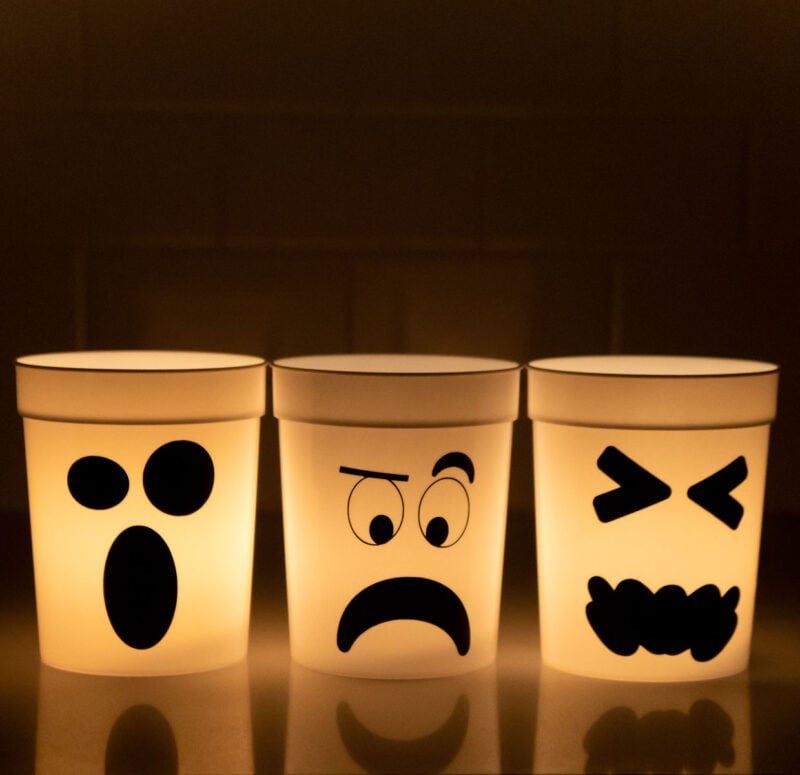
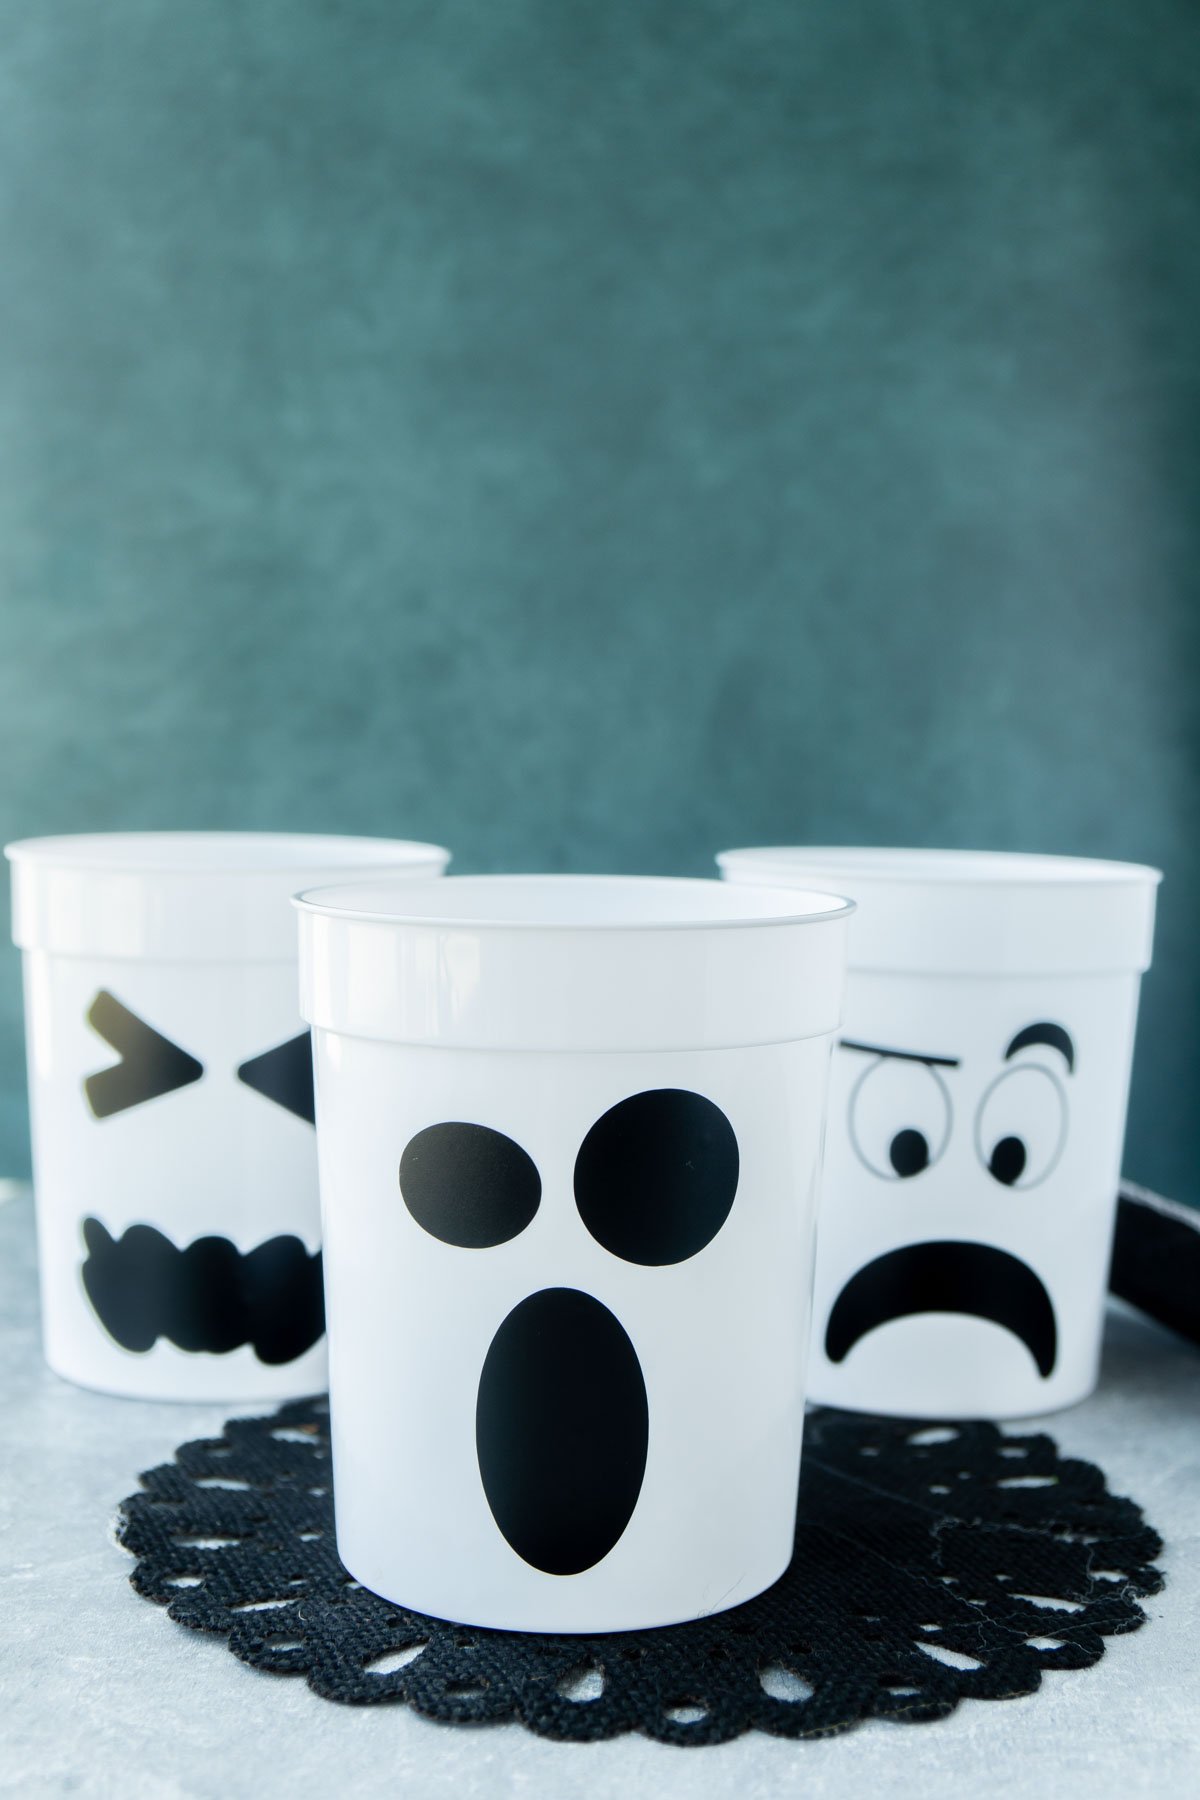
Start by opening the Cricut Design Space file I created for this project or you can create your own ghost faces instead. I just used the shapes tool in Cricut Design Space and spliced things together to make the looks that I wanted. I call them regular ghost, confused ghost, and angry ghost. I made them the size of my cups so just make sure to measure your cups (or white containers) and resize as necessary before cutting your vinyl. When your design is ready, click Make It in the top right hand corner and follow the prompts on the screen to send the design to your machine. No need to mirror the design – you’ll only need to do that with iron on vinyl.
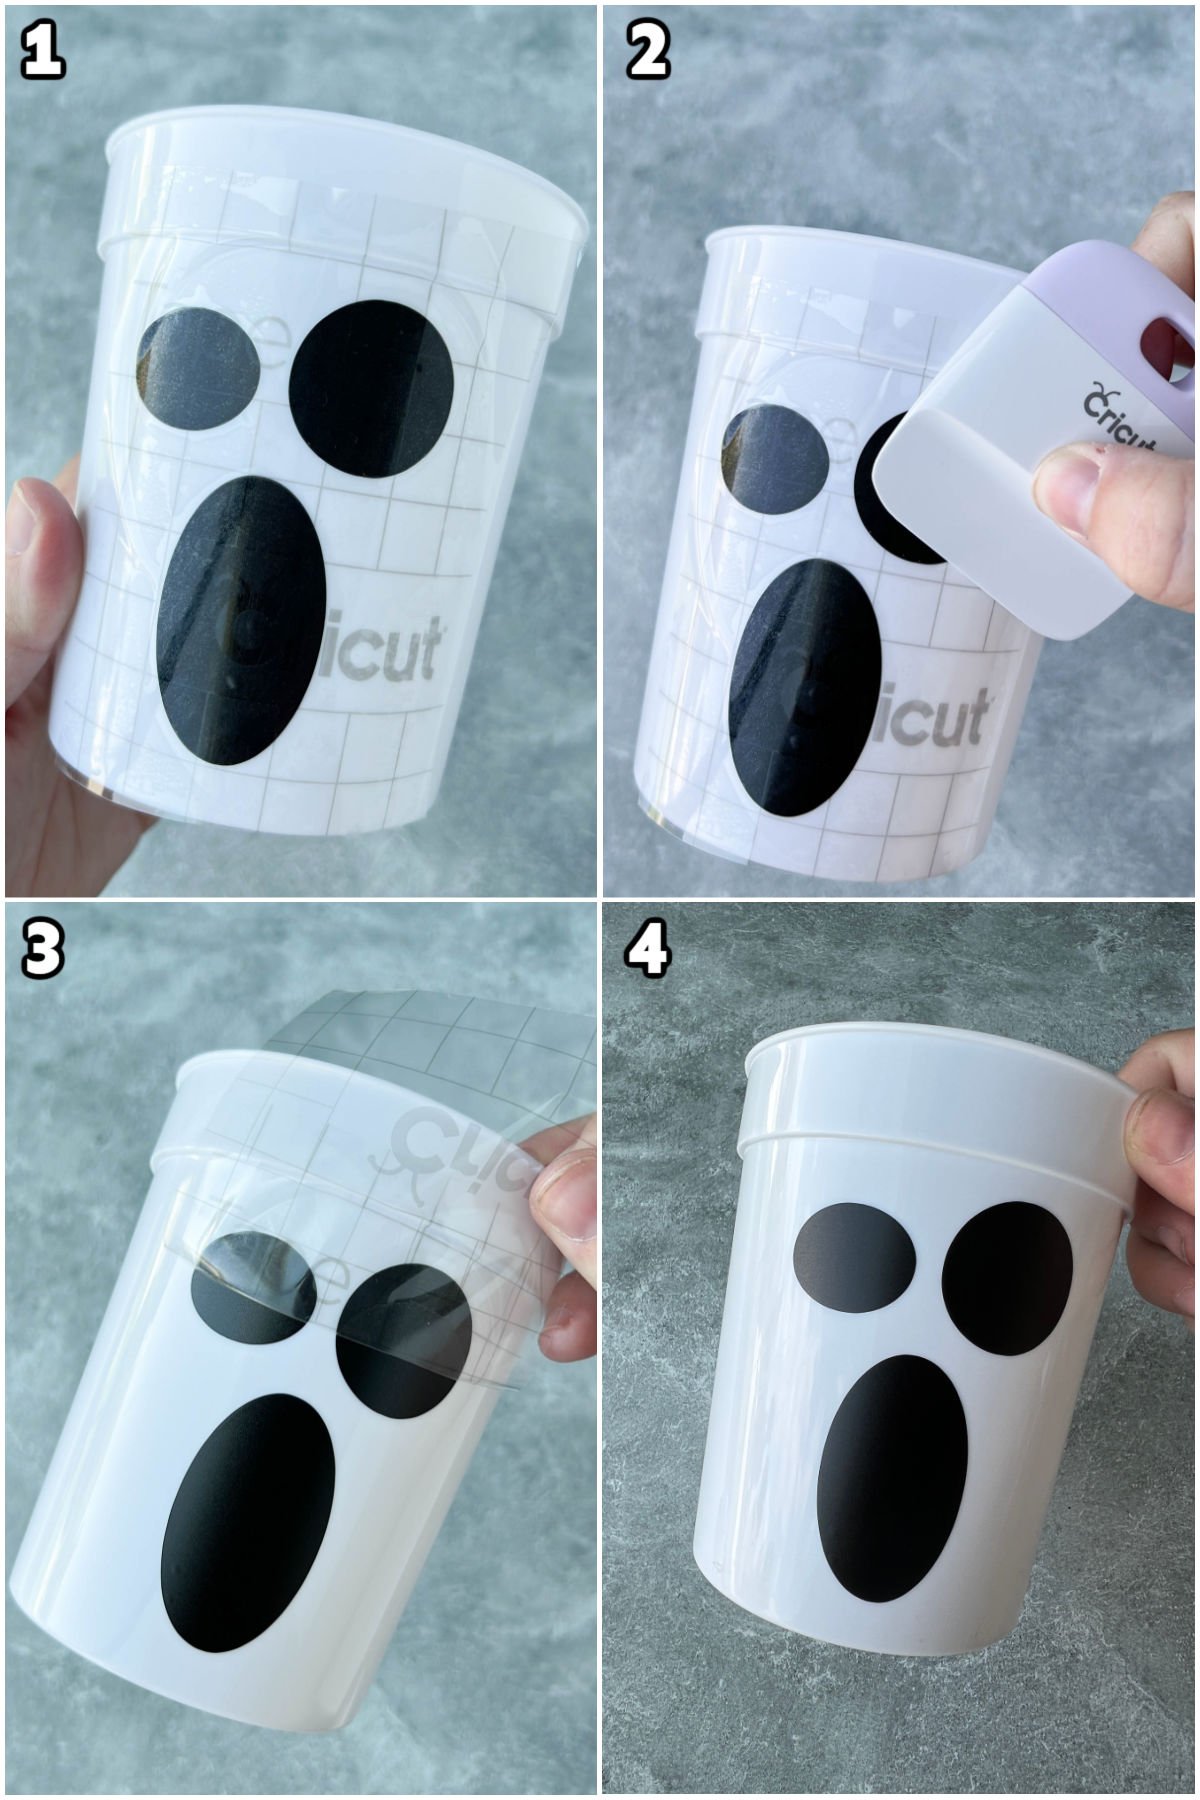
2 – Cut and Weed the Vinyl
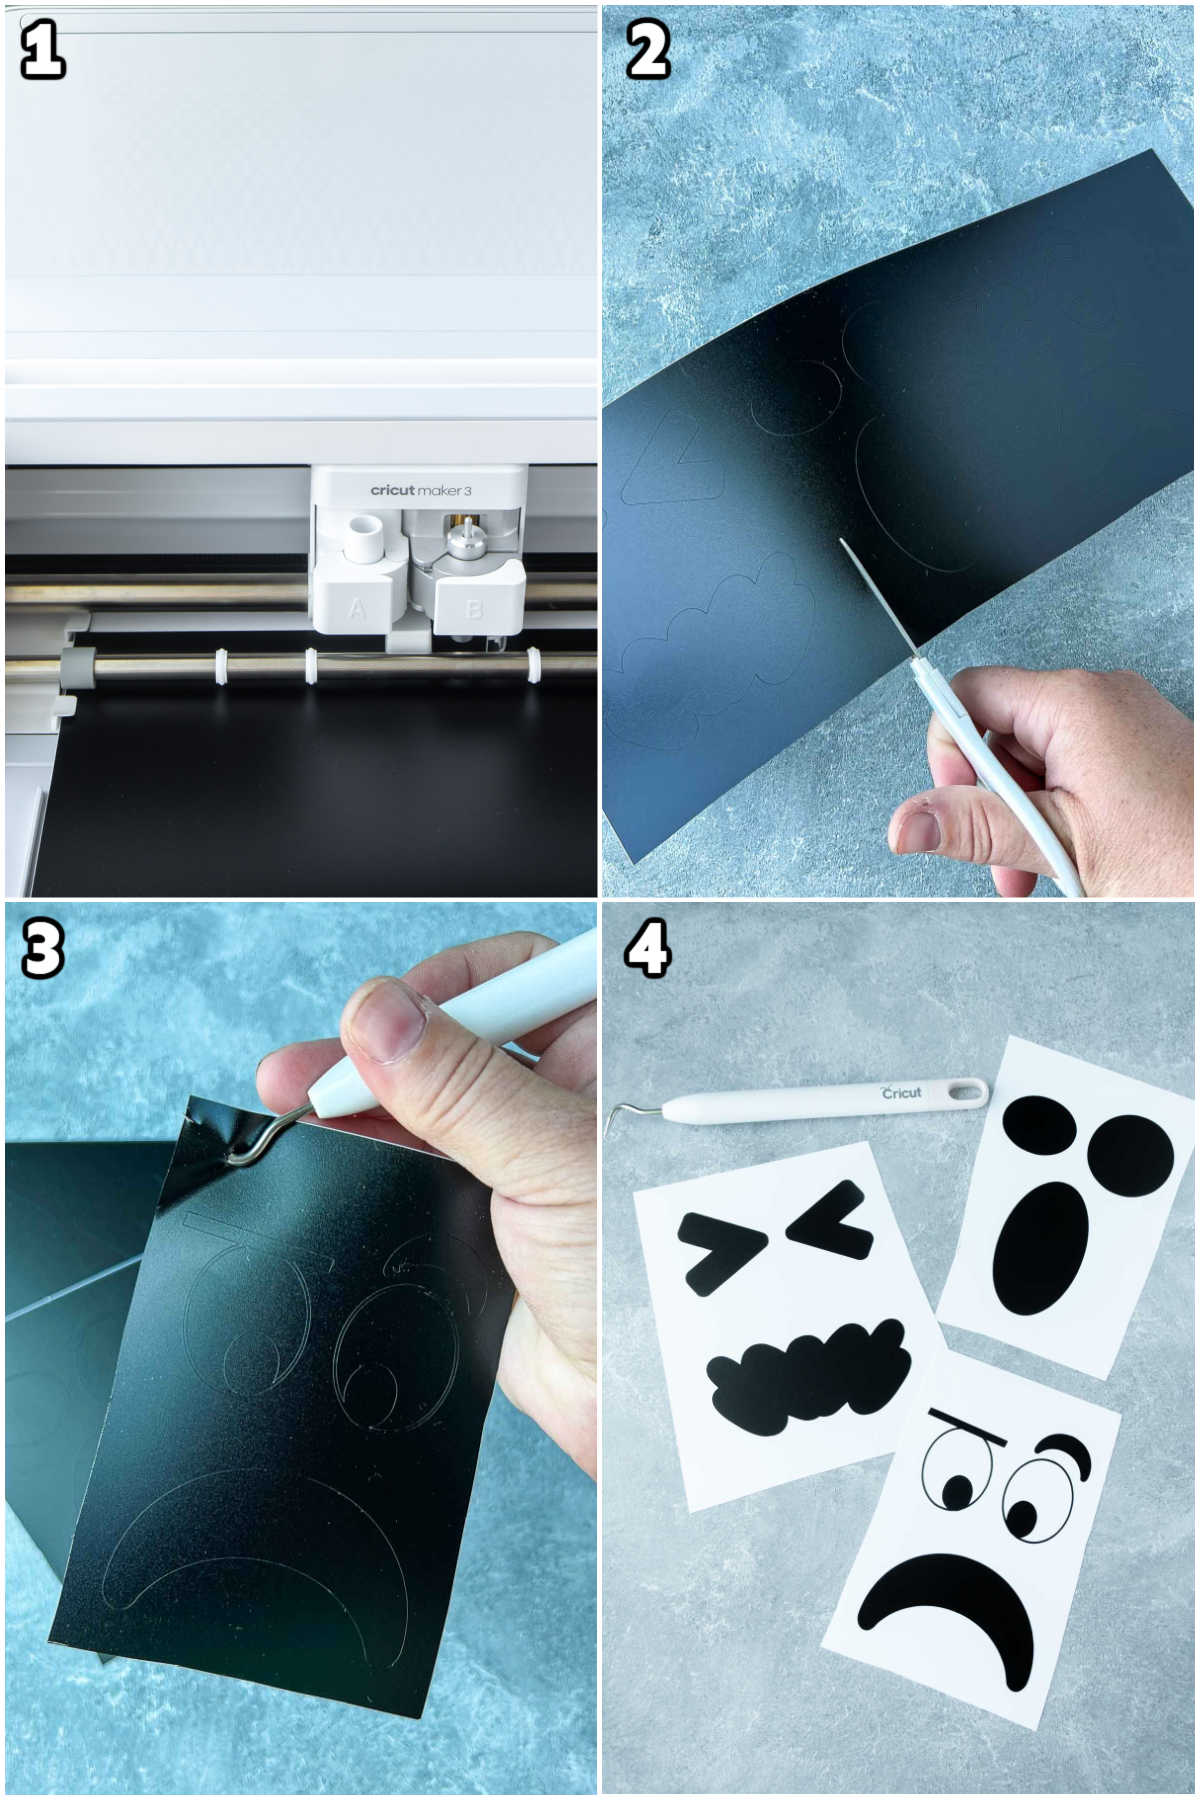
If necessary, place your vinyl on a Cricut mat with the colored part face up. If you’re using smart materials like I am, just follow the prompts on the machine to load your materials into the machine. Then it’s time to cut! Let the machine do its thing and cut the designs out of the vinyl. Once the design is cut, use the scissors to cut around each of the designs so you have smaller pieces of vinyl to work with. Then use the weeding tool to carefully remove the excess vinyl from the vinyl sheet, leaving just the design left on the backing.
4 – Transfer the Vinyl
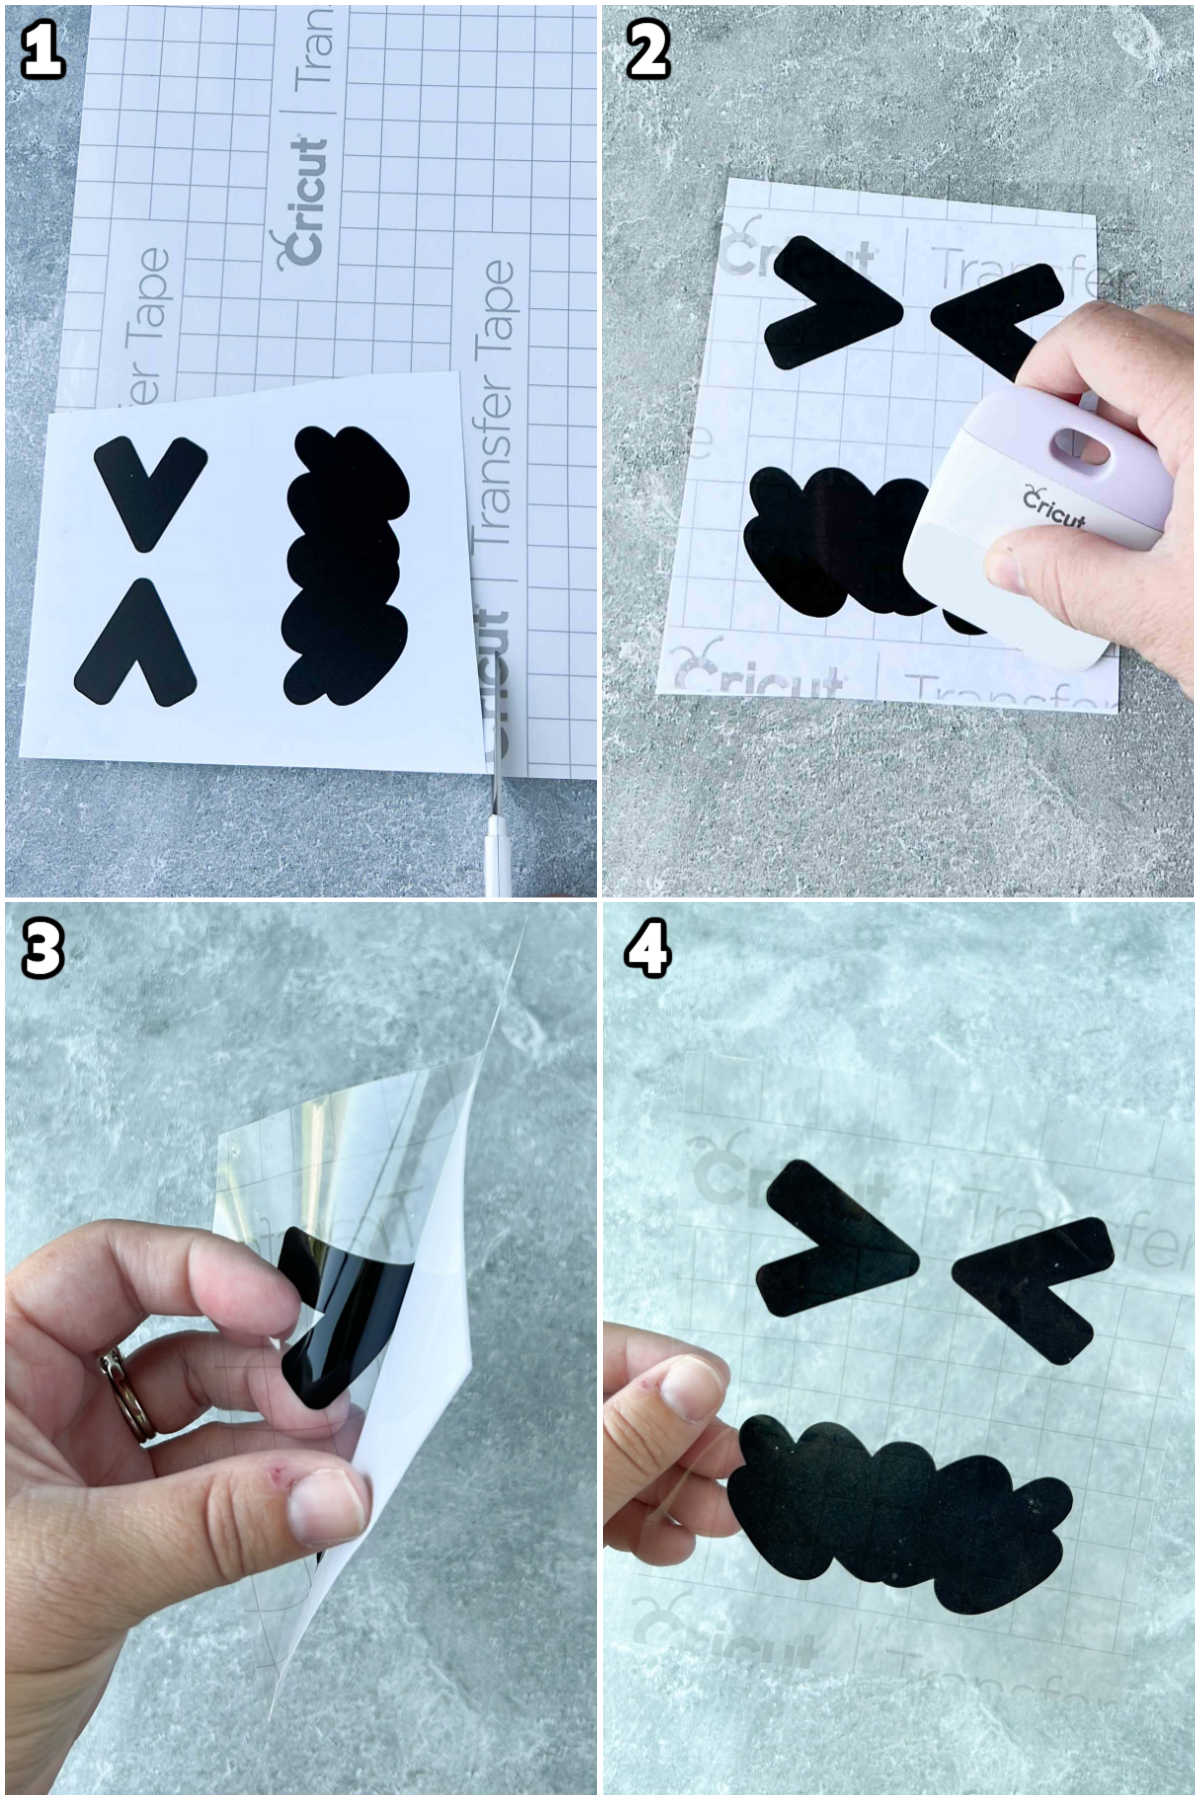
Once your designs are ready, it’s time to transfer the vinyl from the backing to the transfer tape to prepare it for adding to the cups. Start by cutting out a small piece of transfer tape. I like to just place my design on top of the transfer tape and cut around it. Once that’s done, remove the backing from the transfer tape and place the transfer tape, sticky side down, on top of your vinyl design. Use the scraper tool to gently scrape across the design to help it adhere to the transfer tape. I typically do this on both the front and the back for good measure. Once that’s done, gently peel the transfer tape off the backing, bringing the vinyl with you so the design is successfully transferred to the transfer tape and of the backing.
5 – Add the Vinyl to the Cups
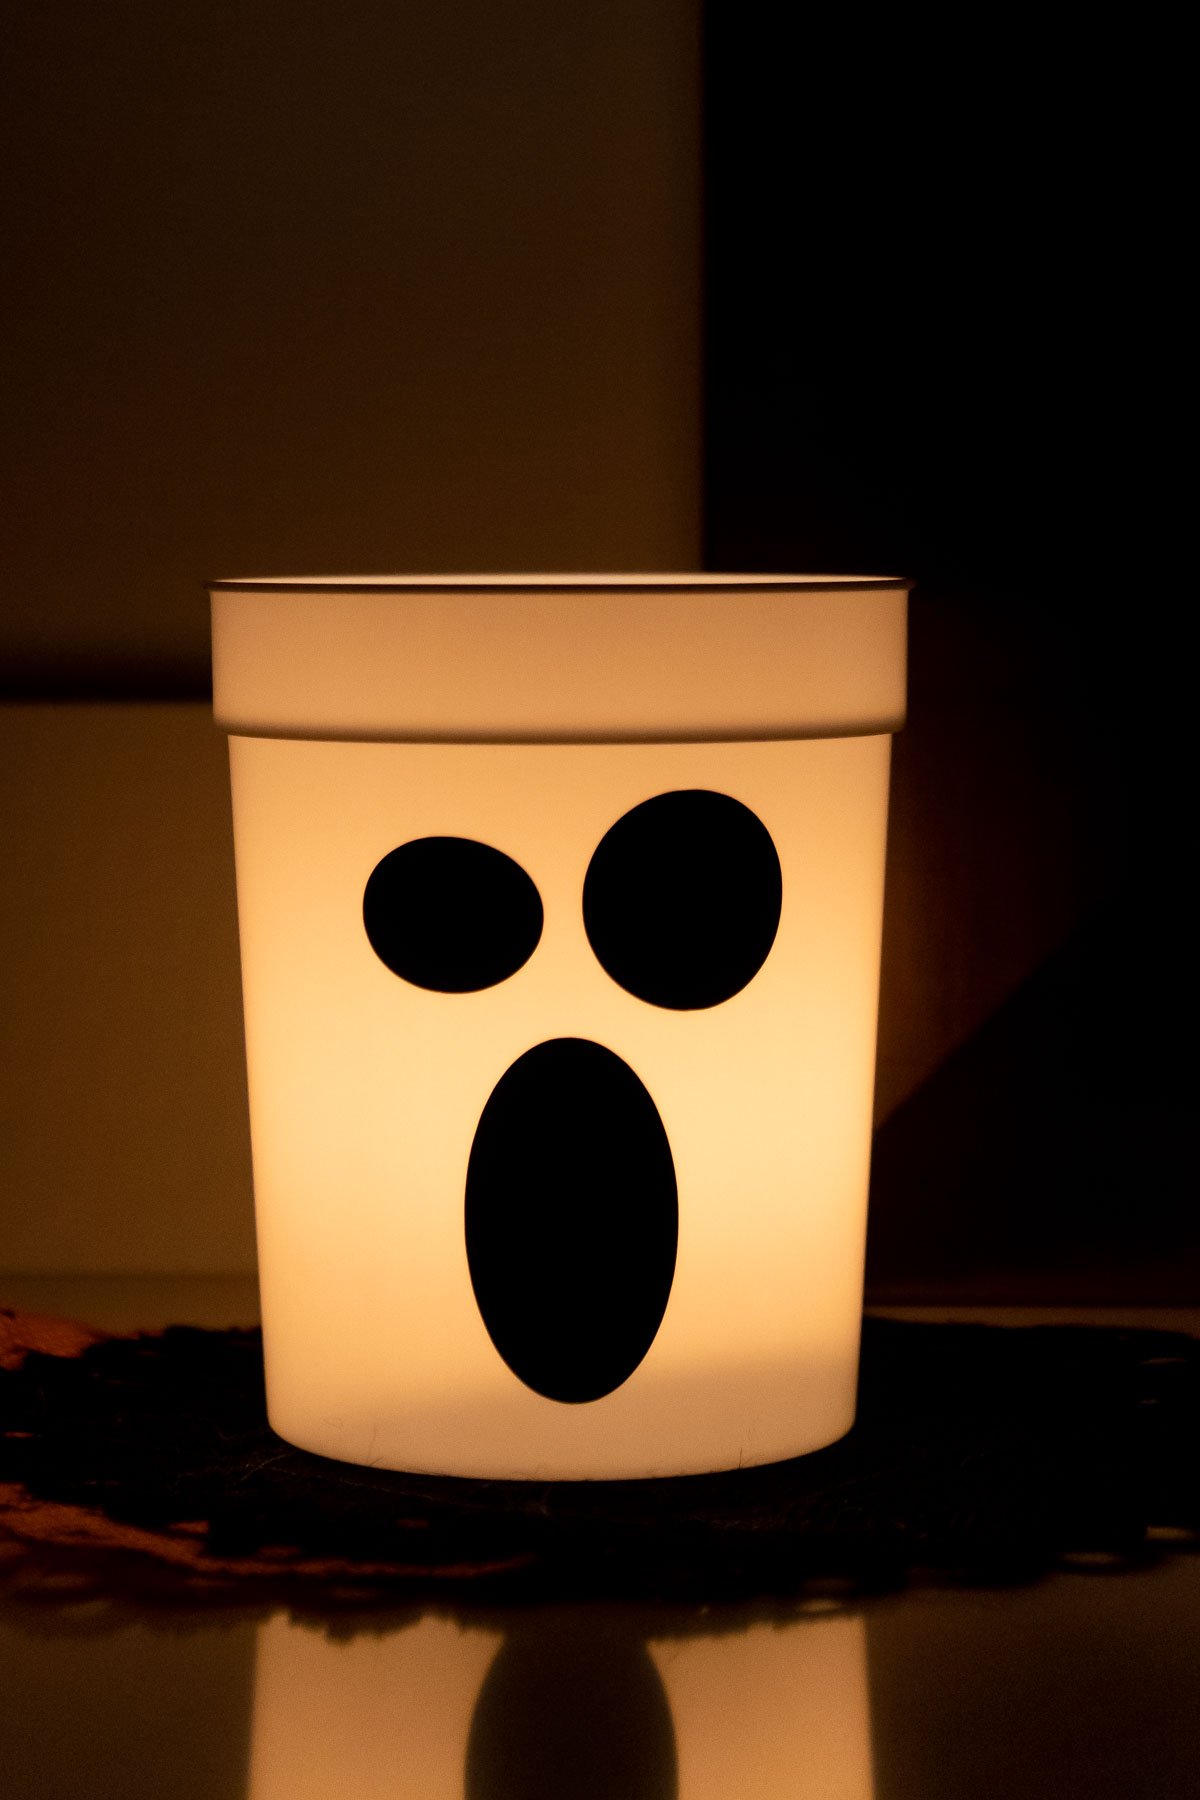
To finish the cups, carefully place the sticky side of the vinyl down onto the surface of the cup, pressing it in carefully. Use the scraper again to press it down onto the surface. Once it’s down, gently peel the transfer tape back up and the vinyl should adhere to the surface of the cup completing the design. Your ghost cup is complete! Repeat with all of your other designs and cups to create an entire ghost collection! Once your cups are done, there are a ton of things you can do with them – drink out of them, add treats to them with Halloween gift tags for party favors, or take it a step further and turn them into Halloween ghost luminaries with the addition of a tea light inside! The white cups light up perfectly and really give you that ghostly feel. I put some in my bathrooms and an entire set downstairs in the basement for spooky movie nights all throughout Halloween season!
More Cricut Tips and Tricks
Whether you’re looking for creative projects to make with your Cricut or tips for Cricut users, these will help!
Outdoor scavenger hunt – find out how to make Cricut stickers with this fun activity for kids!Amazing Race Date Night – this fun activity is the perfect example of how to use the scoring wheel or scoring stylus! Felt pizza – this activity for kids shows how powerful the rotary blade (Cricut’s version of a rotary cutter blade) can be for cutting felt! Outer space party decorations – if you’ve ever wanted to know about how to use Cricut’s print and cut feature, this gives a great tutorial! Cricut puzzle – tips and tricks for cutting balsa wood to make your very own custom puzzle!